
Genderize Names Directly In Microsoft Excel
The Ultimate Excel Tool for Gender Detection
Data cleaning and enrichment should not be a manual, time-consuming hassle. With the Gender-API Excel Add-in, you can instantly enrich your customer lists, leads, and contact databases with accurate gender data without ever leaving your spreadsheet environment. Whether you are a marketing manager aiming for higher open rates, a data analyst cleaning legacy databases, or a business owner improving customer communication, our tool simplifies the complex process of determining gender from first names into a few simple clicks.
Forget about exporting CSV files, uploading them to third-party websites, and re-importing them back into Excel. Our native integration lives right inside your ribbon, allowing you to process sensitive data securely and efficiently. We support all modern versions of Excel, including Office 365, ensuring a seamless experience across Windows and Mac devices.
Why Do You Need Gender Data in Excel?
Excel is the workforce of the modern business world. Millions of professionals use it daily to manage their most valuable asset: their contact lists. However, these lists often lack crucial demographic details that drive engagement. A simple list of names and emails is often not enough to build a meaningful connection. By adding gender information to your datasets, you unlock a new layer of personalization that can significantly impact your bottom line:
- Personalize Email Salutations: Stop using generic greetings like "Dear Customer." Automatically generate "Mr." or "Ms." salutations to show respect and increase engagement.
- Segment Your Audience: Tailor your marketing messages based on gender. Send relevant product recommendations (e.g., men's vs. women's fashion) to improve click-through rates and conversion.
- Clean Legacy CRM Data: Before importing data into Salesforce, HubSpot, or Pipedrive, ensure your records are complete. Fill in missing gaps in your customer profiles automatically.
- Analyze Your Demographics: Understand who your customers essentially are. Visualize gender distribution within your user base to make informed product and marketing decisions.

How It Works: 3 Simple Steps
We have designed our interface to be intuitive and fast. No coding required.
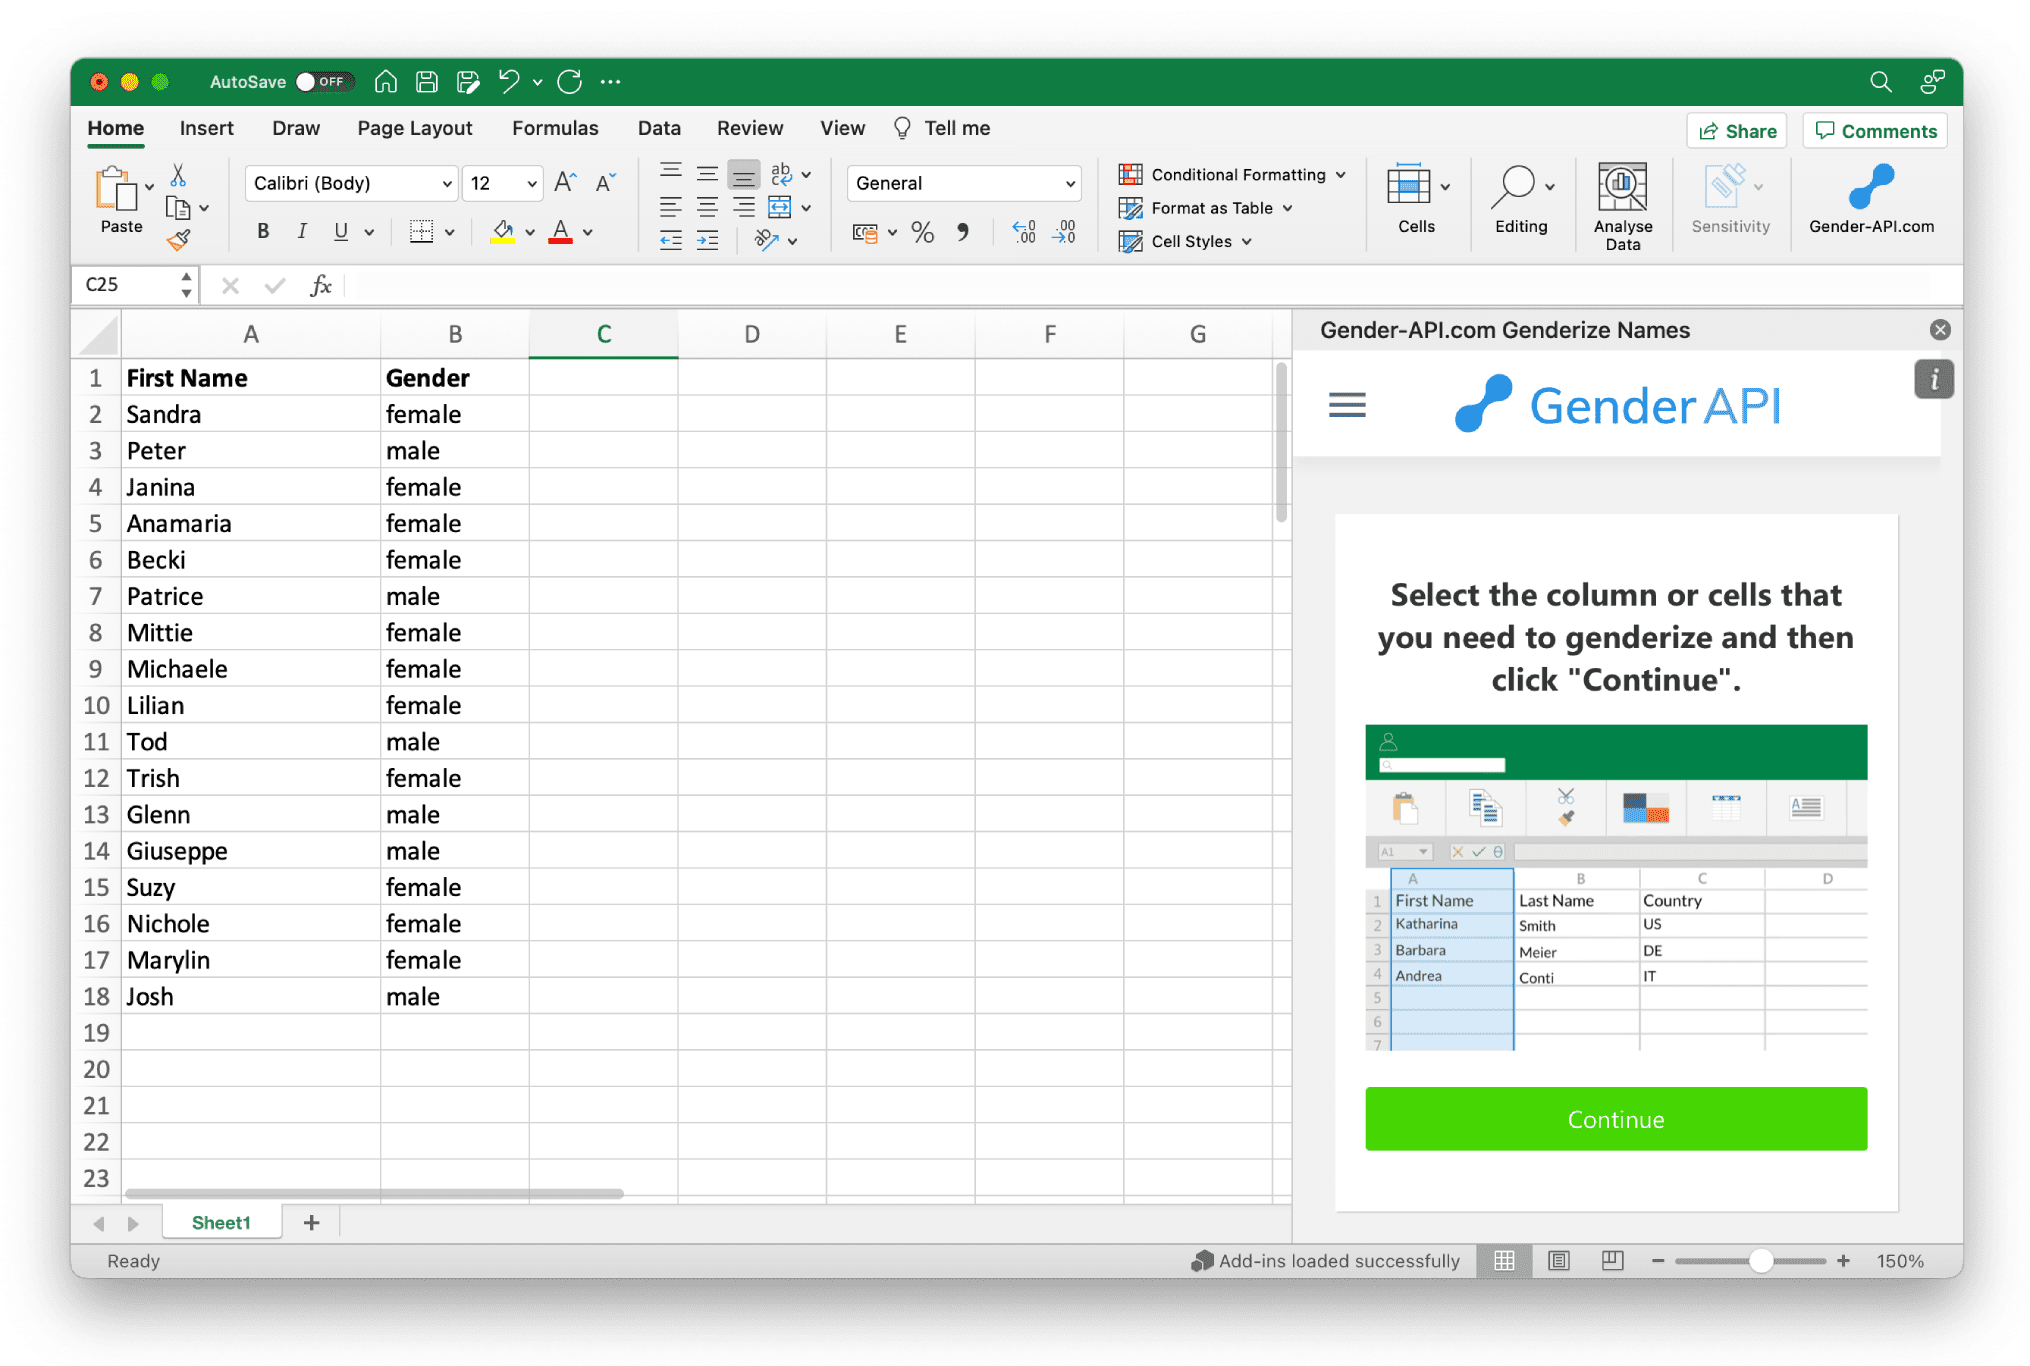
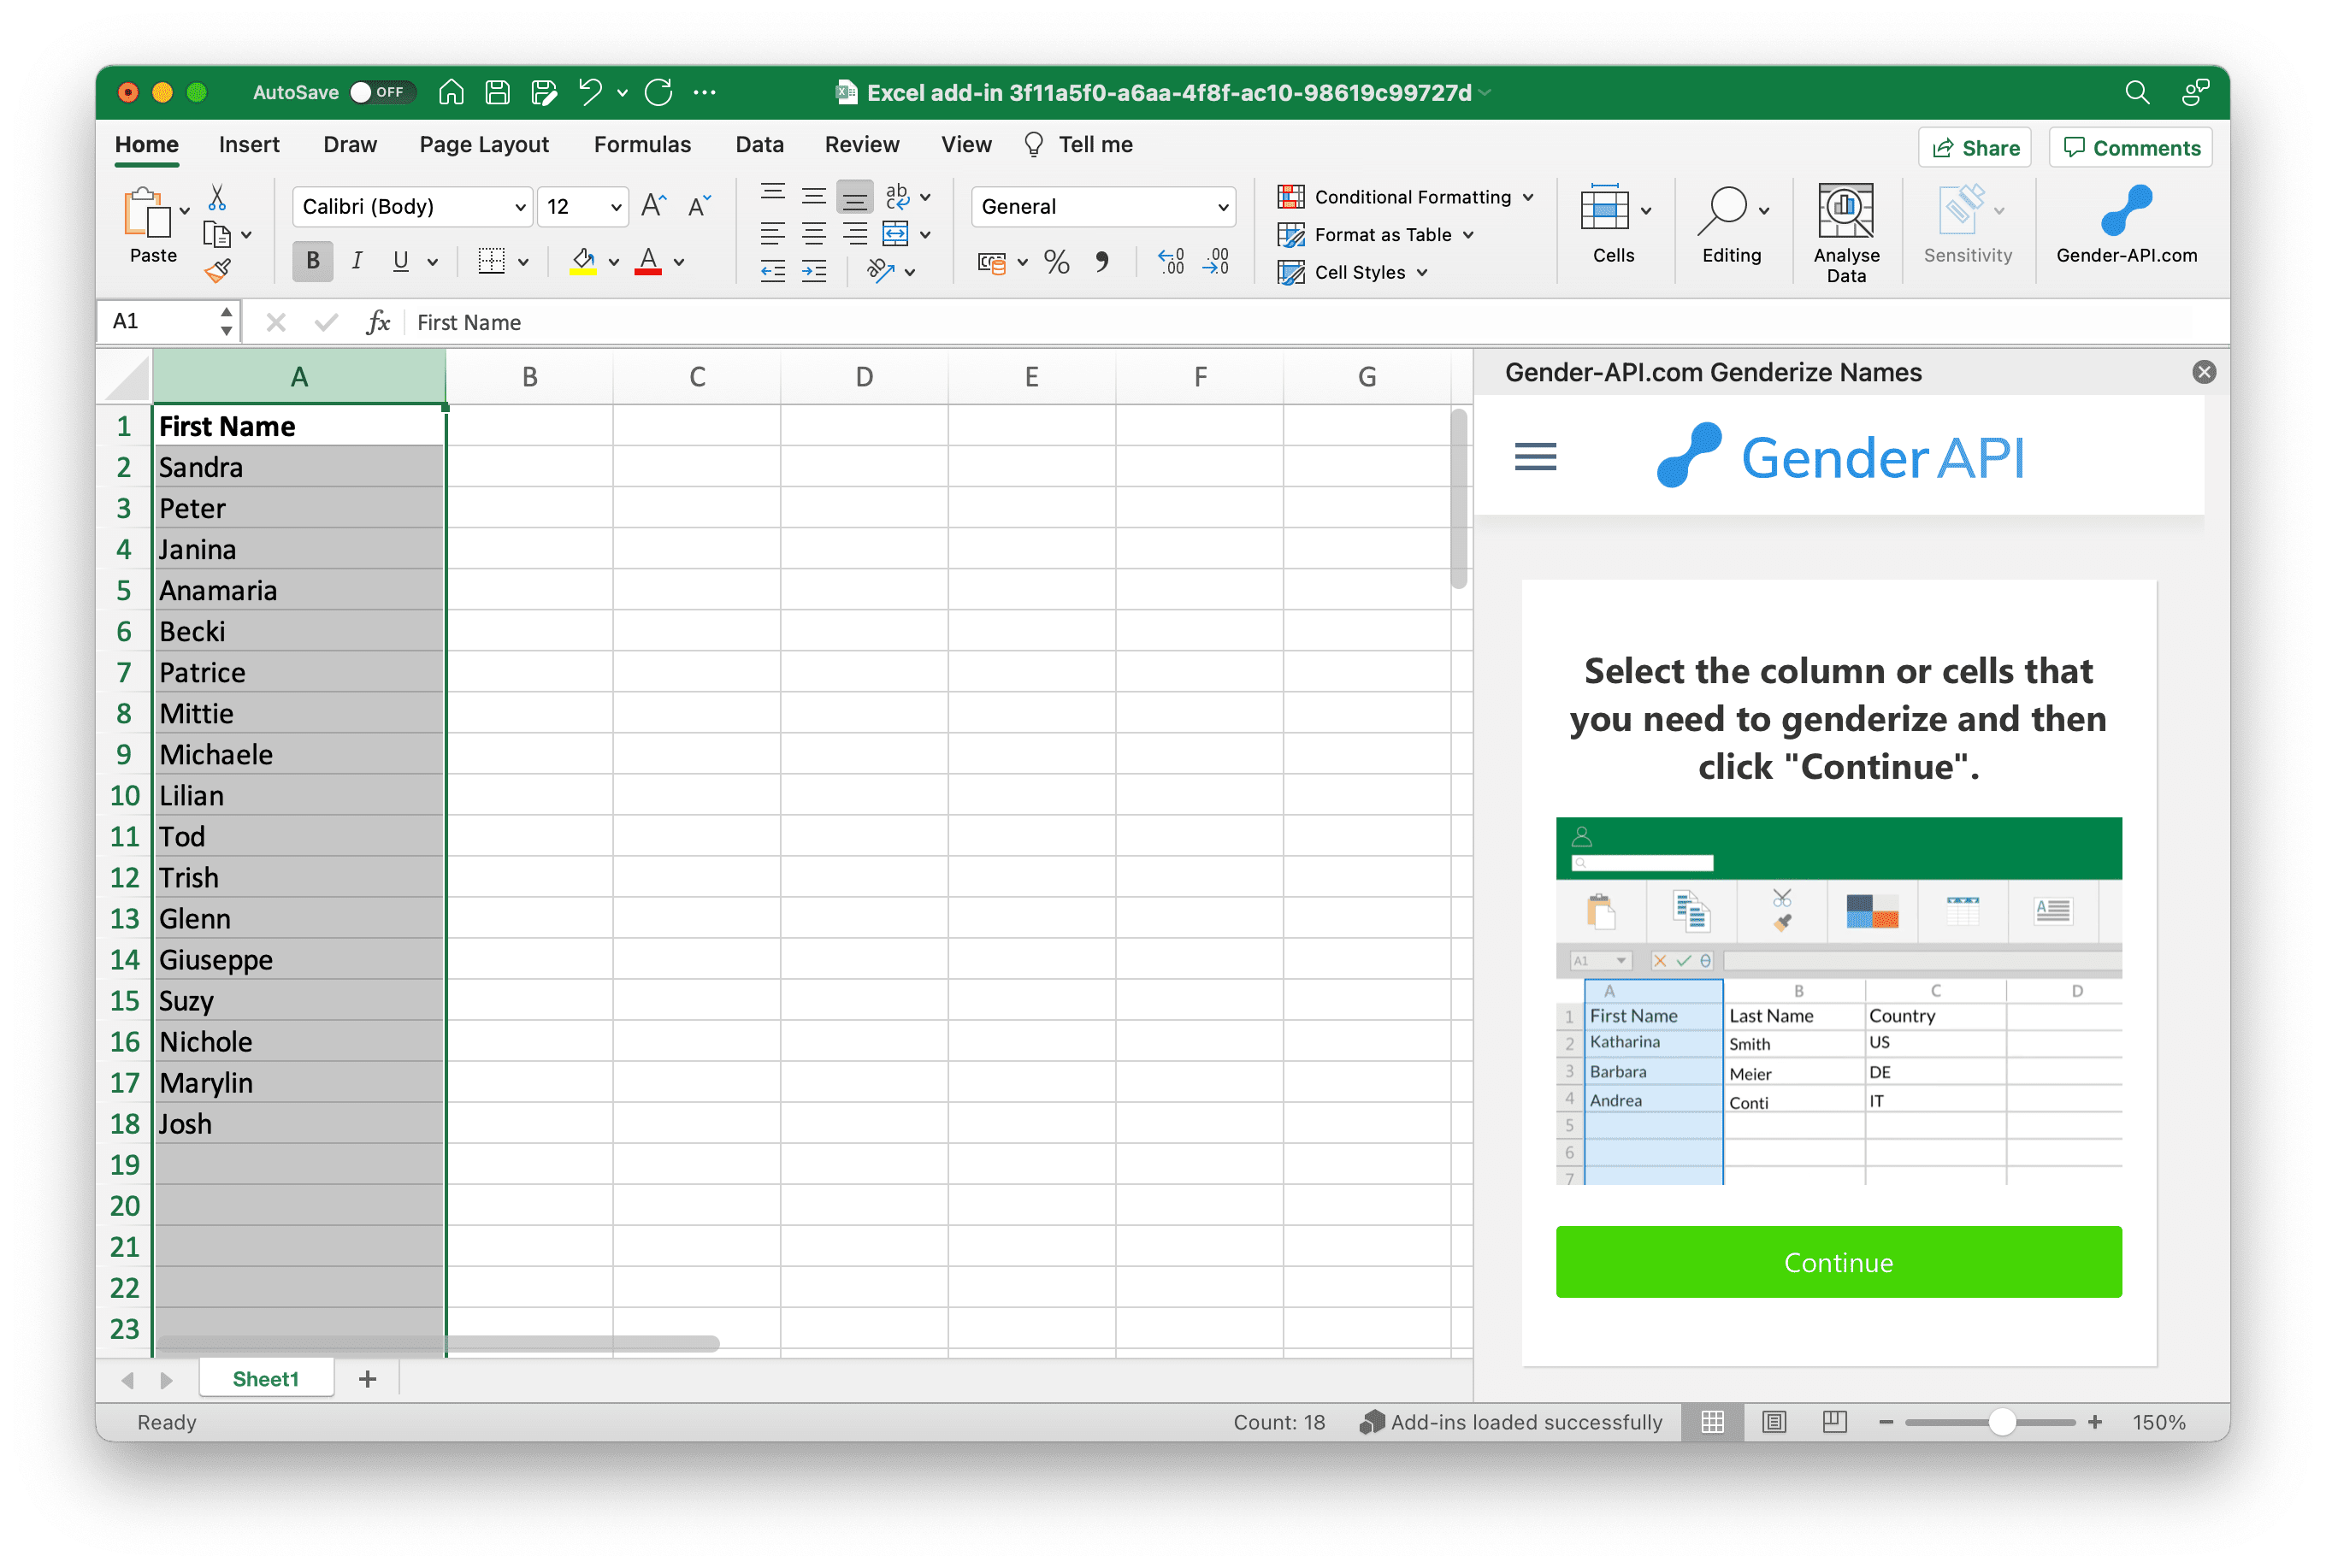
1. Select Names
Highlight the cells containing first names in your Excel sheet.
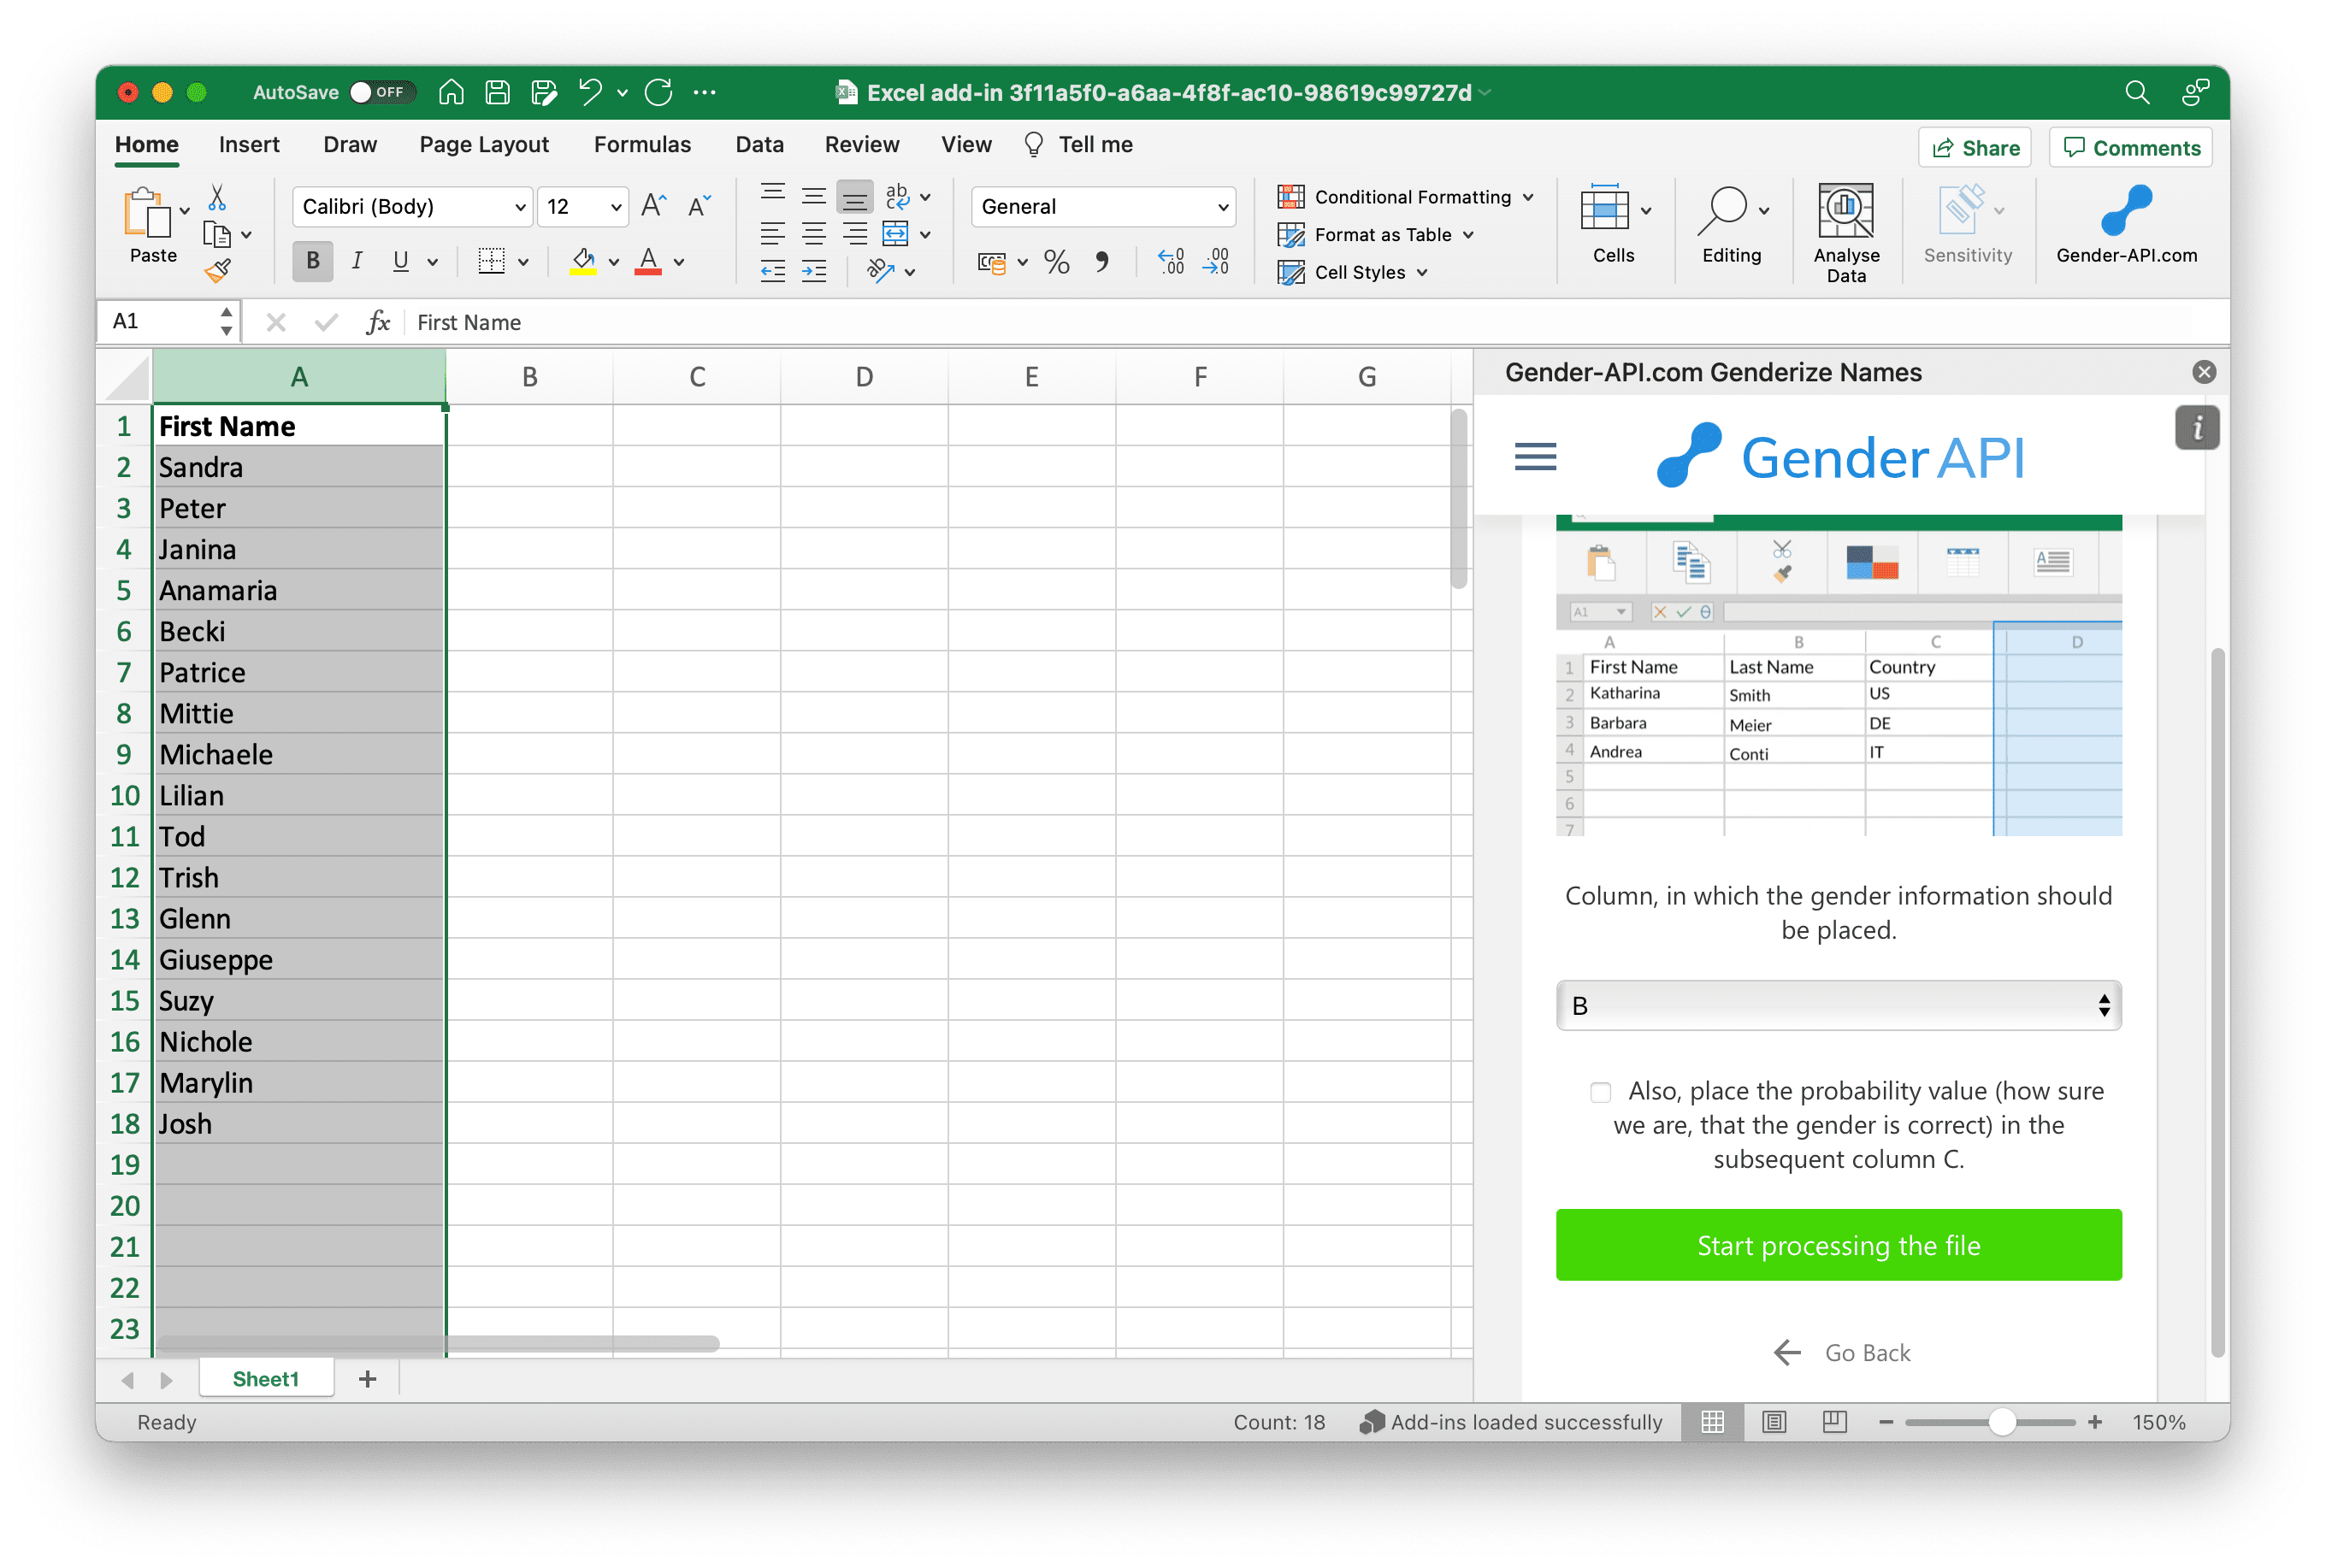
2. Choose Target
Select where you want the gender results to be written.
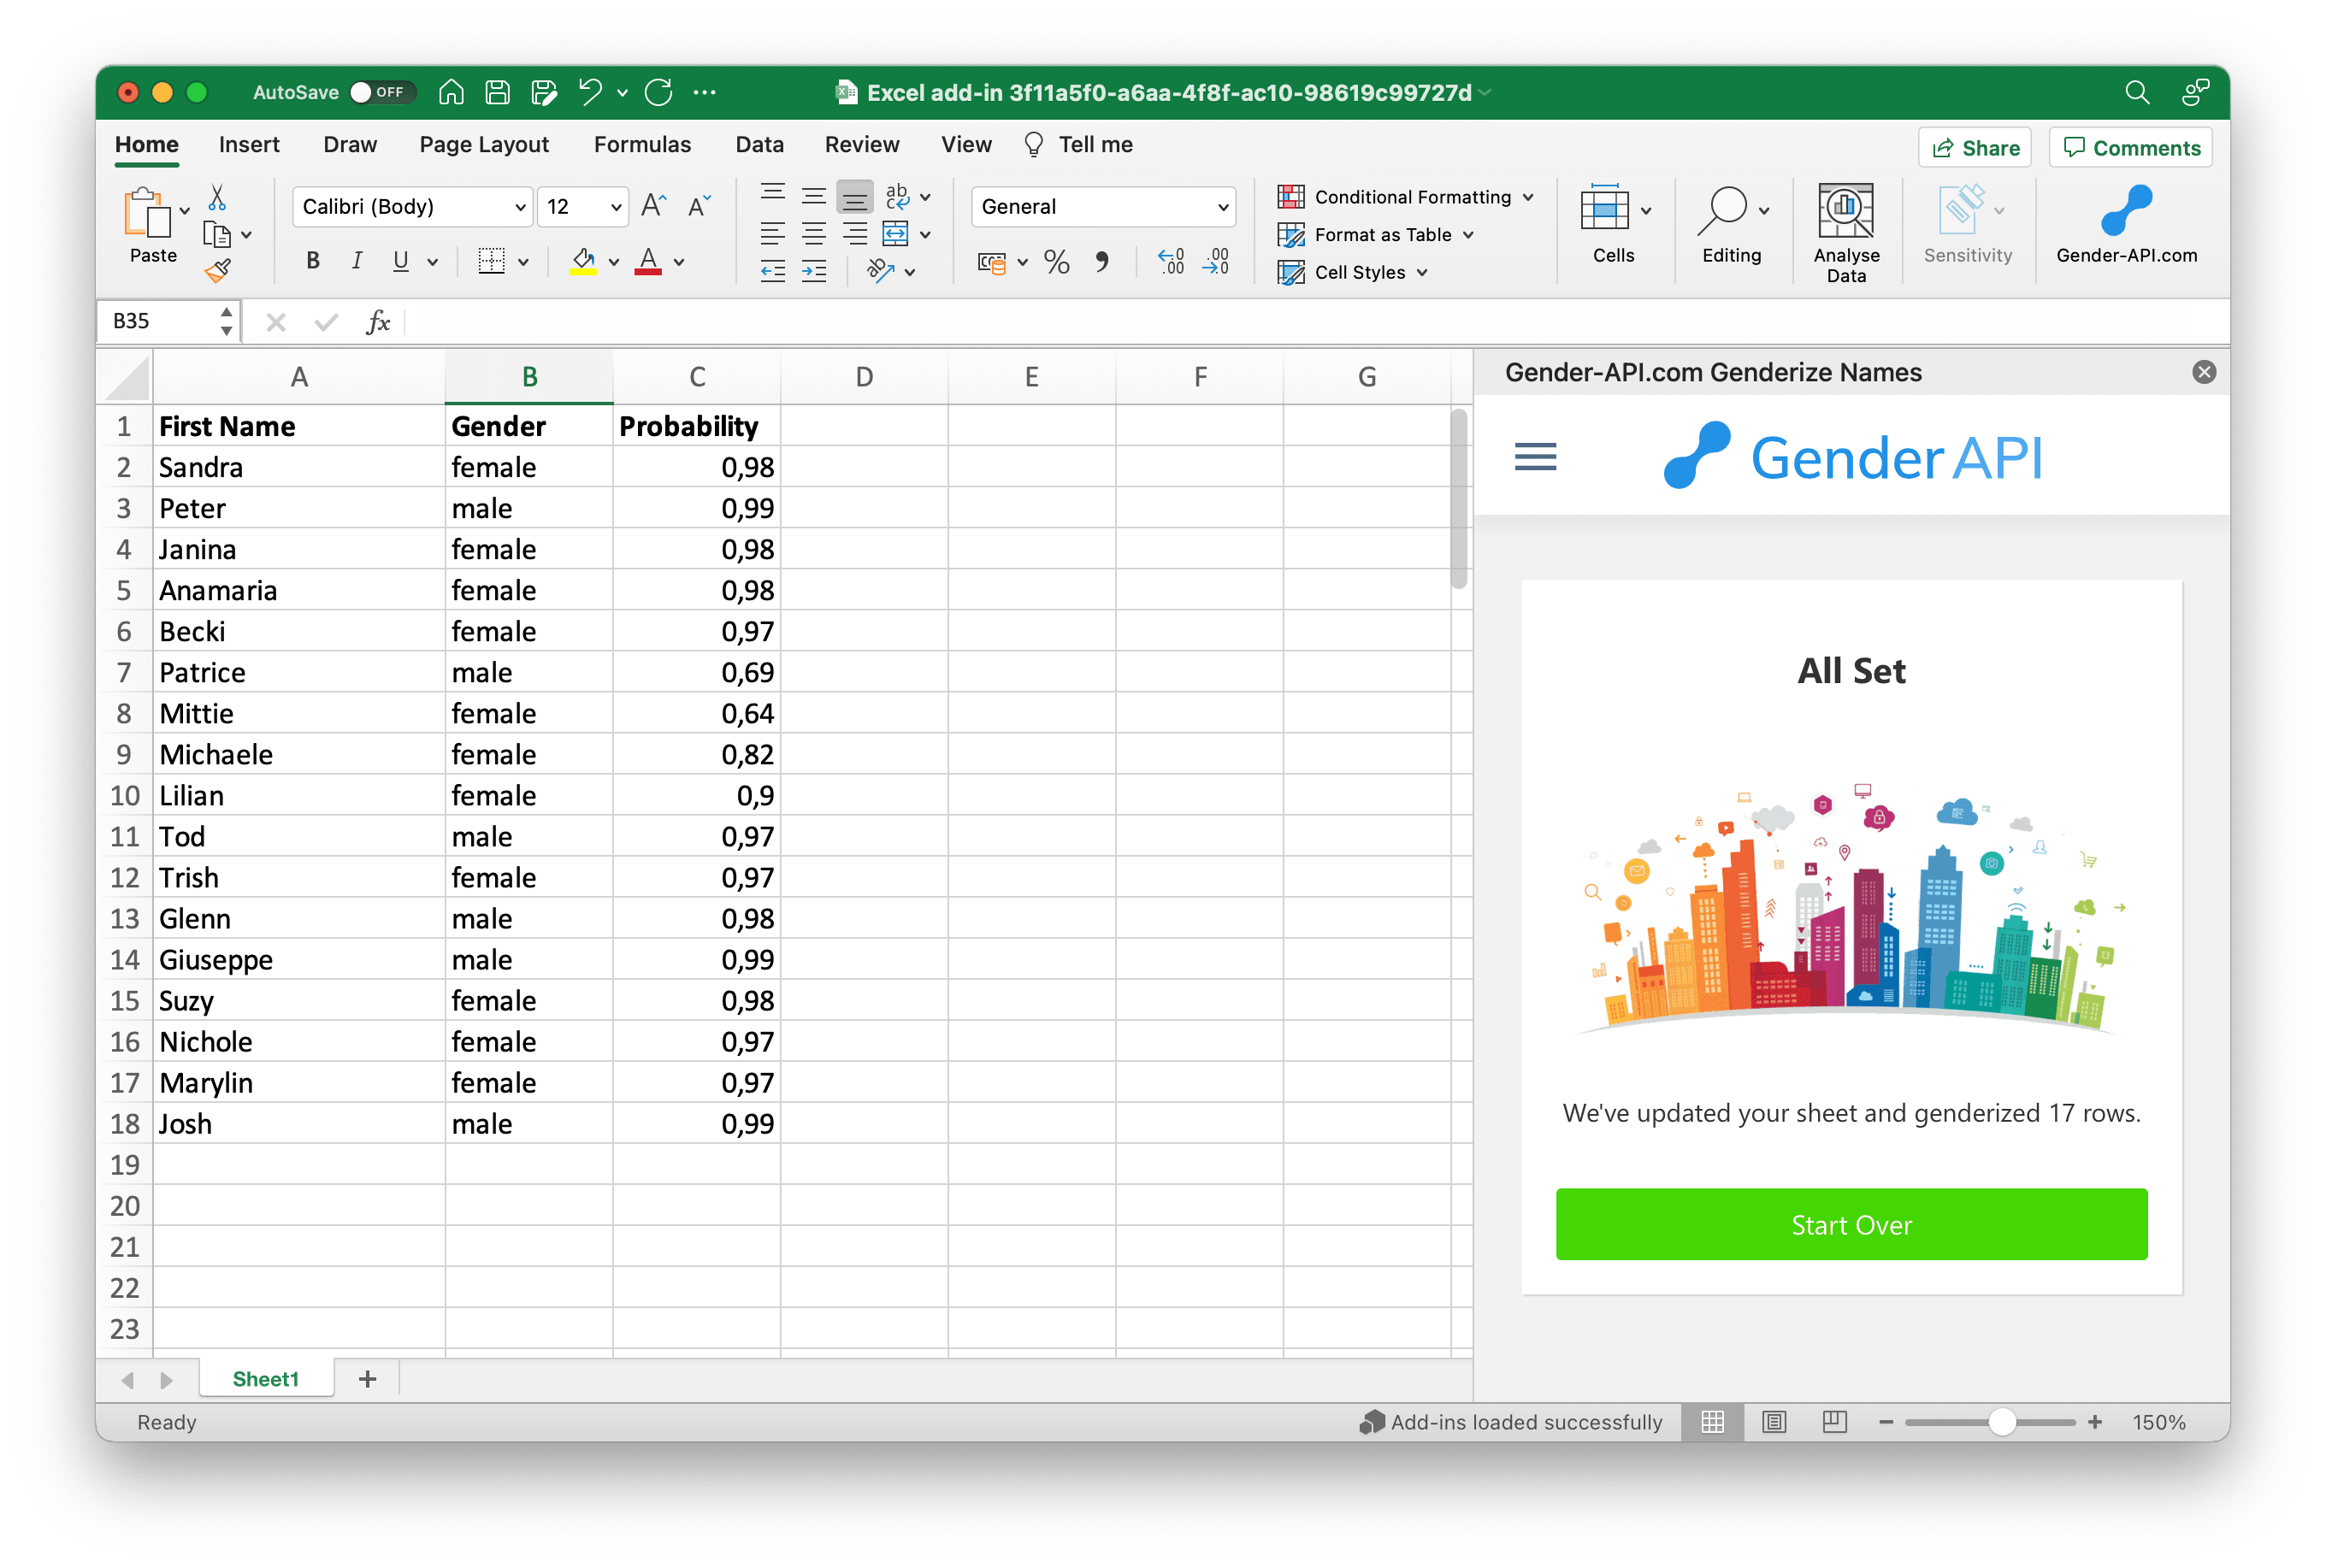
3. Done!
We instantly fill the columns with Gender, Accuracy, and Score.
Powerful Features for Power Users
Bulk Processing at Enterprise Speed
We understand that business data comes in volume. Whether you have a file with 100 rows or 100,000 rows, performance matters. Our infrastructure is built to handle massive datasets efficiently. The Excel Add-in processes your lists in intelligent batches, ensuring stable performance even with very large files. You can let it run in the background while you continue working on other tasks, without freezing your spreadsheet.
This batch processing capability effectively means there is no hard limit on file size. You can clean your entire database in one go, saving hours of manual work or complex scripting.
Unmatched Global Accuracy
Name origins are complex and diverse. A name like "Andrea" can be male in Italy but female in Germany. Our database covers over 190 countries and contains over 6 million unique first names, allowing us to account for these cultural nuances.
When you process a list, you can optionally specify a country column to increase precision even further. If no country is provided, our advanced AI algorithms perform a global lookup to find the most likely gender assignment. We strictly handle multi-part names, hyphenated names, and even non-standard characters with ease, ensuring high coverage for international customer bases.
Data Privacy & Security
We take data security seriously. Your Excel data is transmitted via 256-bit SSL encryption. We never store your uploaded lists permanently. Once the processing is complete, the data resides only on your local machine in your Excel file. We are fully GDPR compliant, making us a safe choice for enterprise use.
Ready to clean up your data?
Install Add-in NowFrequently Asked Questions
Does this work on Excel for Mac?
Yes! Our add-in uses the modern Office.js technology, which means it works seamlessly on Excel for Windows, Excel for Mac, and even Excel Online (Office 365).
Is the Add-in free to use?
Downloading and installing the add-in is completely free. We offer a free package with 100 credits so you can test the accuracy. For larger lists, you can purchase one of our affordable credit packs or a monthly subscription.
What information do I get back?
We provide three key columns: Gender (male, female, unknown), Accuracy (a percentage confidence score), and Samples (how many records we compared against). This transparency helps you make data-driven decisions.
Do you support email addresses?
Yes! If your list contains email addresses instead of first names, our API is smart enough to extract the first name from the email string (e.g., getting "John" from "john.doe@example.com") and then determine the gender. This is a huge timesaver for email marketing lists where you often only have an email address but want to address the person by name.
This feature works automatically. simply select the column containing emails, and we handle the rest, including cleaning up common prefixes and suffixes.
Have any questions?